
How to build a commercial grade Climbing wall. Part Three
- cody771
- Jun 18, 2018
- 1 min read

If you are curious how commercial climbing gym facilities build and design Climbing and Bouldering walls, look no further! This is part two of our blog series about how we built the wall here at Skyhook, click here for part one, and click here for part two if you missed it.

Checking for level

Tacky tack
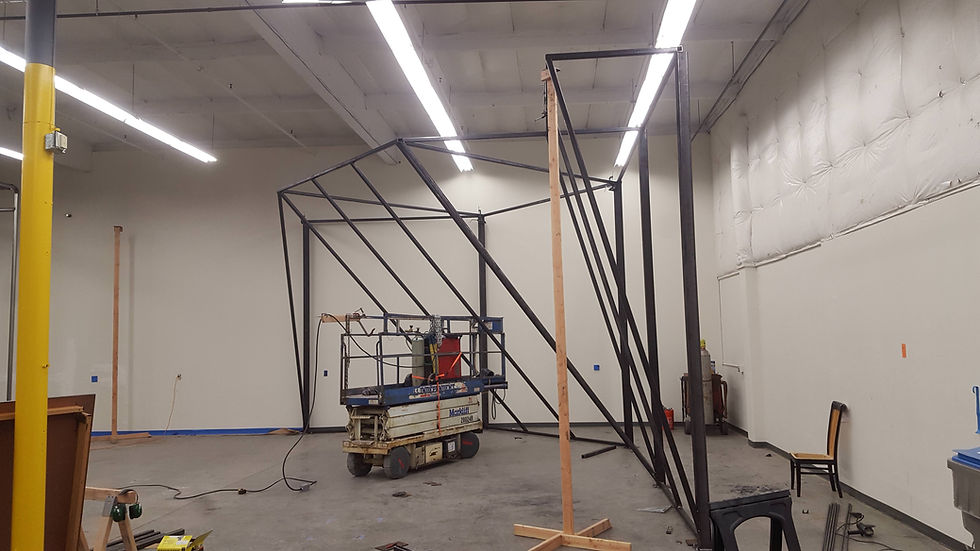
Middle supports are in!

Smoke from welding. Also notice the clamp and angle iron set up. This was essential to building the climbing wall, you can see the clamp holding the angle iron to the angled piece of steel, and then the big clamp from the angle iron to the structure.

Center beams are up! We put them up the same way as the last picture. Clamp and all.

Another view, looking through the ninja rig at the climbing wall as it comes along as well.

Bottom section for the kids area laid out.

Next we built the top of the kids wall, notice the notch that goes around the pole. We laid it out and got it tacked together and then lifted it into place using the scissor lift and a couple of strong guys.

Top partly in place!

Wow! Such progress!


#safetysquint don't tell OSHA

TA DA! Here is the finished frame of the climbing wall. Our next steps would to begin drilling holes for the climbing wall, and putting in T-nuts.

Beams that are 20 feet long need a little support, despite how thick they are. We used angle iron held in tension to provide that.
In Part three, we will start to cover the wall in wood. Click here if you want to read more!


Comments